From Code to Connection: How to Deliver Technical Live Demos That Stick
Viviana Márquez, AI Developer Relations Engineer @ Prolific
January 22, 2026 | The Content Playbook: Smarter Data, AI, Global Docs
Agenda
- Why live demos?
- Tips for live coding well
- Live demo
- Live demo framework
- Practical tool:
RISE
Why live demos?
- They build credibility (the code actually runs)
- They're flexible to audience questions
- They teach process, not just outcomes
- They're memorable
Tips for Live Coding Well
- Prepare like it's improvised
- Narrate constantly
- Fail gracefully and usefully
Live demo
“Create a slide explaining cats.”
Below, two AI-generated slides created in response to the prompt above:
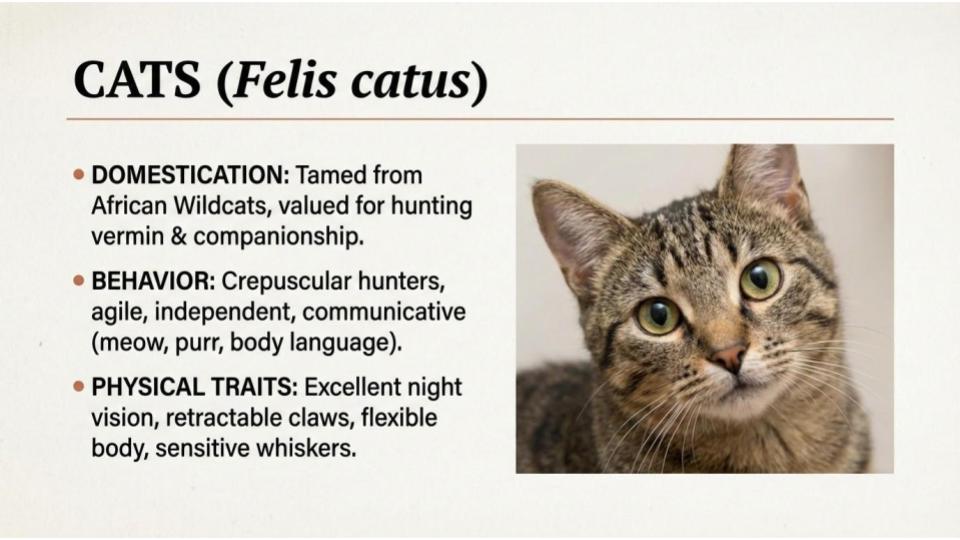 Option 1
 Option 2
Step 1: Authenticate via Prolific's API
In [3]:
# Fetch your Prolific researcher ID
researcher_id = get_researcher_id(headers)
print(f"Authenticated. Researcher ID: {researcher_id}")
Authenticated. Researcher ID: 6866dccc753654157fe0da40
Step 2: Publish task
In [5]:
# Prepare study configuration from config.yaml
study_config = {
    "name": config['study']['name'],
    "description": config['study']['description'],
    "privacy_notice": config['study']['privacy_notice'],
    "reward": config['participants']['reward'],
    "participants": config['participants']['total_participants'],
    "estimated_time": config['participants']['estimated_time'],
    "max_time": config['participants']['max_time'],
    "device_compatibility": config['device_compatibility']
}

print(study_config)
{'name': 'Quick & Easy: Choose Between Two Images', 'description': 'This is a very short task. You will see two AI-generated images and answer one multiple-choice question: simply choose the image you prefer. The task takes less than a minute and has no right or wrong answers.', 'privacy_notice': 'Your data will be used for research purposes only and will be kept confidential.', 'reward': 2, 'participants': 10, 'estimated_time': 2, 'max_time': 5, 'device_compatibility': ['desktop', 'tablet', 'mobile']}
In [6]:
# Create study using external study URL
study_id = create_external_study(
    headers=headers,
    external_study_url=external_study_url,
    study_config=study_config,
    project_id=prolific_project
)
print(f"Study created with ID: {study_id}")
Study created with ID: 69718f802306c7c242f82e9e
In [7]:
# Publish study using helper function
status_code = publish_study(headers, study_id)
print(f"Study published with status code: {status_code}")
Study published with status code: 200
Step 3: Get results
In [15]:
# Fetch and display study results using helper function and configured timezone
df = show_study_results(study_id, headers, config['timezone'])
✅ Study Name: Quick & Easy: Choose Between Two Images
📊 Status: ACTIVE
👥 Total Places: 10
📩 Total Submissions: 9
⏳ Created at: 21 Jan 2026, 06:46 PM PST
🕒 Last Response At: 21 Jan 2026, 06:53 PM PST
⏱️ Time Lapsed: 7 minutes
In [16]:
# Fetch Prolific data and create visualizations
merged_df, figures = fetch_and_visualize_survey_results(config, df)
================================================================================
All Comments (2 total):
================================================================================

Comment 1: Thank you so much! I love cats very much.

Comment 2: no
Live demo - Framework
- What's the need?
- What's the solution?
- What's the next step?
Practical tool: RISE
- It turns Jupyter notebooks into interactive slideshows where you can run code live
- Documentation: https://rise.readthedocs.io/
How does RISE work?
Installation:
- Current (using Jupyter Lab):
conda create -n rise_slides python=3.14 jupyterlab jupyterlab_rise -c conda-forge
- Deprecated (using Jupyter Notebook):
conda create -n rise_slides python=3.10 notebook=6.5.4 "tinycss2<1.5" rise -c conda-forge
General tips when using RISE
- Build incrementally. Use fragments strategically
- Put setup code in skipped cells and run it beforehand
- Use Markdown for cells for text
Let's connect
- 📊 Slides: https://github.com/vivianamarquez/Technical-Live-Demos-That-Stick
- 💼 LinkedIn: /in/vivianamarquez
- 🐙 GitHub: @vivianamarquez
Viviana Márquez | AI Developer Relations Engineer @ Prolific